Have you heard of bone broth? Maybe you’ve heard it mentioned but aren’t quite sure what it is why it is so highly praised by many.
Bone broth is simply a liquid obtained from boiling bones from chicken, turkey, pork or beef in water. The biggest difference between bone broth and regular stock is that bone broth is cooked a lot longer. And it is far more nourishing.
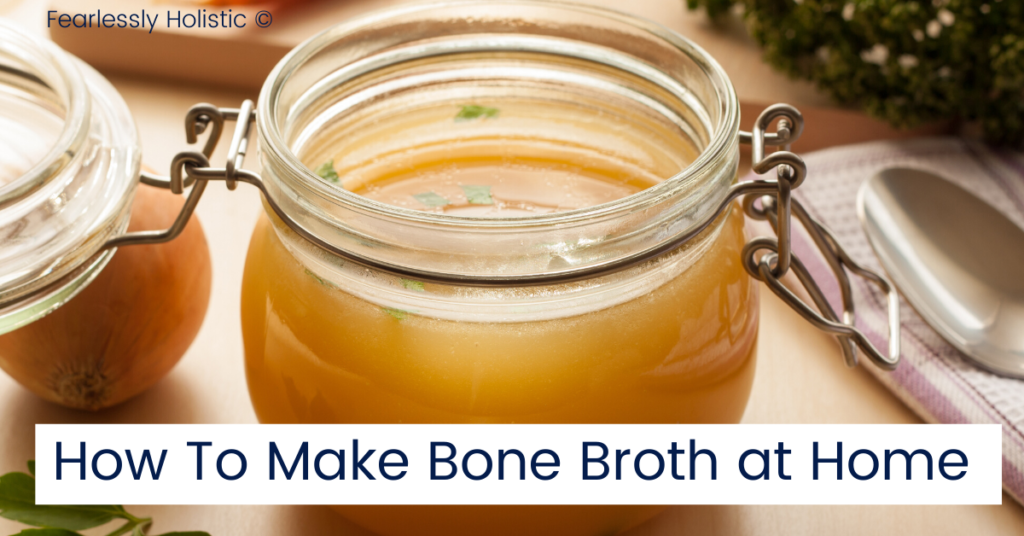
The end result is a tasty liquid that’s delicious on its own, but also makes a wonderful and nutritious base for soups and stews. And it tastes better and is superior to any broth from a can or tetra box.
Hello and welcome to Fearlessly Holistic.
My name is Irma and I want to share my journey to improved health by eating whole foods, moving my body and eliminating stress as much as possible. It is my hope to inspire you to make daily changes.
Why? Because eating fresh, seasonal food and getting some sunshine is the best way to increase longevity. But you do not want just a long life. You want a quality long life.
I like to focus on simple concepts and moving forward one step at a time for sustained progress. If that sounds good to you, then be sure to read any “Related Post’s” within the page for more quality information.
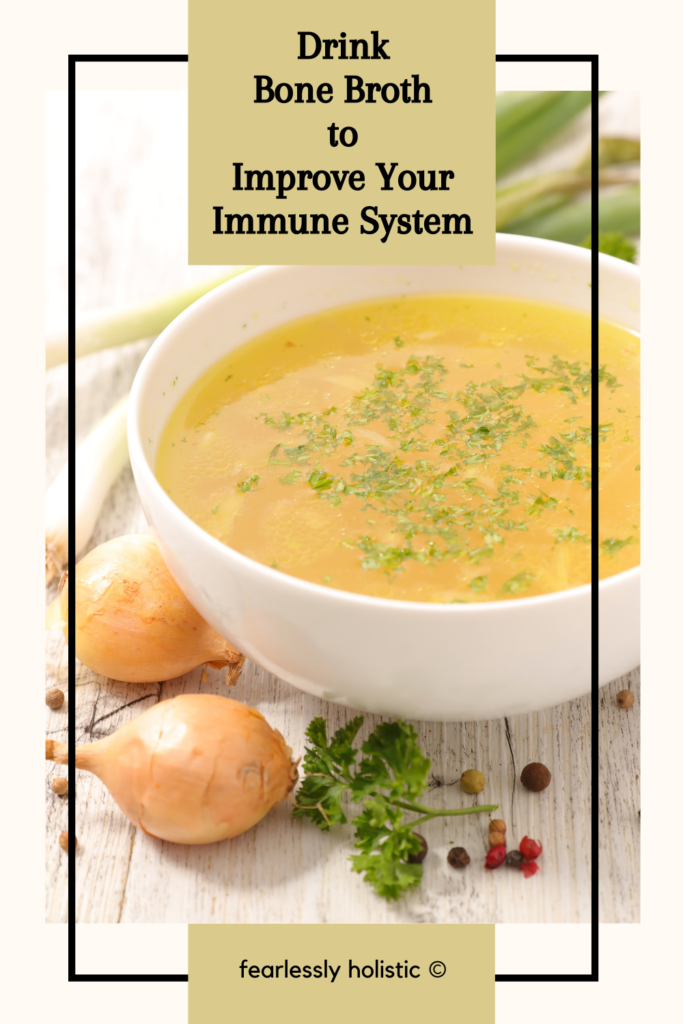
Benefits of Homemade Bone Broth

Broth, at its most basic, is roasted bones simmered in water for at least six hours, but up to 48 hours.
When you boil bones for a long period of time, you leach all sorts of nutrients, minerals and other things that are good for you like glucosamine and collagen, as well as amino acids like proline, arginine, glycine, and glutamine.
Homemade broth is good for your immune system because of theses minerals and collagen; bone broth is a traditional healing food, much like fermented foods are healing for the body.
Remember grandma making a big pot of chicken soup anytime someone would get sick?
The same principal is at work here. Grandma knew that your tummy needed what bone broth offers…nourishment and collagen.
Think of bone broth as a more concentrated version of Grandma’s healing soup.
To make bone broth you take bones like those from that leftover chicken or turkey carcass sitting the fridge for example. Cover it with water and simmer for several hours.
Related Post: Clean Eating for Beginners
How long you cook your broth is up to you, but cooking it for 24 hours yields great results.
12 hours gives you a very decent broth, but cooking it even longer makes it even more nutritious. I try to always cook my broth for at least 24 hours to extract all the minerals that I can.
After cooking the bones for 24 hours, they will be so soft that you can squish them between your fingers (only try this with the cooled bones).
You can drink the finished hot broth as is.
Or season it up with your favorite herbs and spices, or use it to make a pot of soup or stew. If you are on a low carb eating plan, add some quality sea salt for taste and minerals. #bonus
The cooled broth can be stored in the fridge for about 4 days or in the freezer for up to a year.
For 18 benefits of bone broth read this post from Louise Hay.

How To Make Your First Batch Of Bone Broth
Items you will need:
- Bones – Poultry, beef, pork, or wild meat bones, any combination. Freeze until needed. I have several large zipper bags for bones; when there gets to be too many of these bags in my freezer, I make broth.
- Large pot – I have a large stainless steel pot – 15 litres – with a clear acrylic lid. It is perfect this task. Alternatively, you can use a slow cooker.
- Long spoon – You want to be able to reach the bottom of the pot to keep things from sticking and potentially scorching or burning
- Vegetable trimmings (optional) – I freeze ends and skins of onions (for color and flavor); ends (washed) of celery, plus the leaves. I do not use carrots, as the taste can be overpowering (carrots available in winter can be strong flavored).
- Water – Enough to cover the bones. Be careful not to top up your broth with too much extra water or you will thin out the taste. And it will not gel up.
The easiest way to make your first batch of bone broth is to start with a cooked chicken.
Roast it yourself or head to your local grocery store and pick up a rotisserie chicken. Pull the cooked meat off the chicken and serve it for dinner.
Store any leftover meat in the fridge to use later on to make chicken soup with the bone broth you’re about to make.
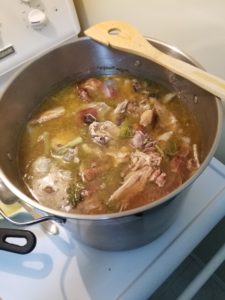
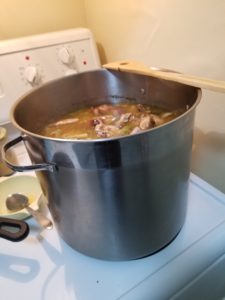
Put all the bones and any remaining bits and pieces of meat into a large pot.
If you are using organic or pastured animal bones you can throw in the skin and fat as well, for extra flavor.
Set the pot over the appropriate burner. Cover the bones with cold water. Do not over fill your pot or you risk it boiling over. You can always add more water later if you need to.
I put my bones in the pot and then use a pail, or large bowl, to add the water to the pot while it is on the stove.
Next, add a good splash of apple cider vinegar to the pot.
This step is optional. If you don’t have the vinegar in your pantry don’t worry about it. You can add a splash of red wine or white vinegar if you’d like.
The vinegar helps get all the minerals out of the bones and into the broth.
Turn up the heat and bring to a full boil.
Skim any foam that you see (discard it) and then reduce the heat to a simmer. Cook your bone broth for a minimum of 12 hours on medium-low heat.
Longer is better, say, up to 72 hours but not everyone has that much time.
Don’t simmer the broth while you’re out of the house or sleeping, unless you are using a slow cooker.
If you broth appears to be boiling on medium-low, turn you burner down to the lowest setting. Boiling broth is what makes the finished product cloudy looking, instead of clear. This is aesthetics and does not affect the taste.
Start the broth in the morning on a day when you know you’ll be home. Simmer it all day until you’re ready to go to bed. Turn off the burner for the night, but keep the broth sitting on the stove. In the morning, bring the liquid back to a boil and continue simmering.
The broth will be tasty after a few hours of simmering but will get better with time.
After it has cooked for 12 hours you can start to use it. When the time is up, let it cool a bit before straining.
I like to use a 4 cup measuring cup to take out as much broth as I can. Then I set a colander inside my largest mixing bowl and I pour the broth/bones in, throwing the used bones into the garbage.
Be careful discarding the piping hot bones.
Then I wash and rinse my pot, dry it and then pour the broth back in.
I will then cook down my broth for a further six hours. This concentrates the broth and I can freeze it in less containers. I store in plastic containers in my refrigerator, and when it is completely cold I move it to my freezer.
I fill 8 ounce, 32 ounce and 2 liter containers. This way I can use a little if I want to drink some broth. Or I have larger containers for making sauces or soups.
You can also freeze broth in ice cube trays, then put the frozen cubes into freezer zipper bags for easy storage.
Ideally, your broth should thicken up as it cools…to the consistency of “jello”.
Firm and gelatinous broth means that you have extracted the best elements from the bones, namely the collagen. As the broth cools, you can dip a spoon into it. If the broth coats your spoon, you did it right. Yay!
Now you can make “pocket soup” if you have a food dehydrator. Check out the the video below:

Avoid adding more water to the broth while cooking, as you thin out this benefit (and the flavor).
What Bones Can You Use To Make Bone Broth?
Bone broth can be made from just about any type of bone, but for best result, make sure you include some larger bones containing marrow and some knuckles and/or feet (chicken) to get plenty of collagen. Beef neck bones work well.
As with the meat you eat, try to get the best quality bones that you can afford: pastured, grass-fed, and organic.
You can mix bones, like pork, beef or poultry, in one batch. I add steak and pork chop bones to my poultry broth, unless they are coated in something like barbecue sauce, which I don’t want in my soup broth.
I try to time my broth making for the colder months. This has the added benefit that I can store my broth (covered) outside for the night when I am doing a longer cook time, like 48 hours.
Keep fish or seafood bones separate from your other bones
The delicate flavors will be wasted in a large pot of chicken or beef broth. Save fish broth for poaching fish or making seafood soup like clam chowder.
Chicken Bones
Chicken bones are perfect to make your first batch of bone broth. Go buy a nice organic chicken. Roast it and enjoy the meat for dinner. Toss everything else into a large stock pot, cover with water and simmer at least 12 hours.
If you’re in a rush, you can even pick up a rotisserie chicken at the grocery store and use the bones when you’re done to make broth. It’s a great way to make sure you’re using up every little bit of the bird and you and up with some tasty broth.
You can make broth from raw bones, but the flavor will be better if you roast them in the oven first.
That goes for all bone broth.
I buy raw, pastured chicken necks and backs if I am out of my own bones. My butcher sells me a box at a time and he cuts it into manageable chunks that fit in my pot.
I roast them for 1 hour then proceed with broth making.
Turkey Bones
Turkey works just as well as chicken. If your pot is not large you may have to break the turkey carcass apart. Breaking the bones is beneficial to helping extract more nutrients.
I always mix turkey bones with chicken because I only cook a whole turkey once or twice a year.
Bone broth freezes really well. Make a big batch and run the broth through a strainer. when the broth has cooled, skim the fat layer before freezing.
Store it in containers and freeze until you’re ready to use it.
Beef and Pork Bones
Both beef and pork bones make for some amazing broth. If you are going to buy bones from a butcher shop, get a variety like marrow bones (sometimes labelled dog bones) and neck bones.
Marrow bones usually have no meat or connective tissue attached, so they are not flavorful. But they contain the marrow, which is nourishing when cooked and eaten.
Marrow will eventually dissolve into your broth as you cook it. If you want to eat the marrow by itself, scoop out a bone that still has its marrow and use a teaspoon to get the marrow out. #tasty
Neck bones have lots of meat bits attached and more collagen, but are harder to come by, which is why I hoard all my leftover bones. You can save any leftover bits of tough meat from roasts to add to your broth pot as well.
Your local farmers market is another great place to source your bones.
Talk to the farmers that live in your area. Finding local farmers is getting easier, as more and more people want ethically farmed meat.
Check websites like eatwild.com, americangrassfed.org, or localharvest.org for information on local farms in your area.
Roast your bones before you make the broth for best results.
Just spread them out in a roasting pan and bake at 350 F for an hour. You can roast cut up onion and celery along with the bones.
Allow them to cool until they are comfortable and safe to handle. Put the bones (and veggies, if used) in a large stock pot, add water to cover and simmer for at least 12 hours. Throw any juices or browned bits from the roasting pan into your stock pot for extra flavor.
Use a combination of marrow bones and knuckle or neck bones to get the best broth with the most health benefits.
Bison and Wild Game Bones
If you’re lucky enough to have a hunter in the family, ask him to save the bones for you. Or call up your local game processing business and ask about buying bones from deer. You treat them just like pork or beef bones.
The same goes for bison bones. If you have a bison farm in the area, it is worth making a call. Give one or two bones to you dog and the rest go in the soup pot!
Conclusion
I hope that you have enjoyed learning about bone broth and how you can easily make it at home. I have been making my own homemade broth for about 15 years now, since I learned of all the health benefits.
I recently used up my entire supply when I was sick and was on a liquid diet, and I healed faster because of it. Luckily my family has all joined me in eating carivore/ketovore, so I have a good supply of bones to make more!
Related Post: Ketovore
I hope that you have enjoyed this post and will share it with anyone who can benefit. Sharing is caring!
And follow me on Pinterest!
Until next time, here is to our health!
-Irma 🙂